How To Replace Trunk Shocks Using Aftermarket Trunk Shocks from LiftSupportsDepot.comBy Antithesis
Duration:15 - 30 minutes
Products:New trunk shocks and ballstuds:
![[Linked Image]](https://celicahobby.com/installs/guides/trunk_shocks_lsd_01.jpg)
I bought mine from
www.liftsupportsdepot.com. [
liftsupportsdepot.com.] They come in a pair with each trunk shock individually wrapped complete with shock the and a new ballstud. The company delivered in a manner of days. I was very pleased with their quality and service.
Cost:Approximately $90 plus shipping
Suggested Tools:* Hacksaw or Dremmel
* Butane Lighter or Heat gun
* Sturdy wooden plank, pole, or a friend with arms
* 12 MM Socket Wrench
* Adjustable wrench
* Masking Tape
You should always replace your trunk shocks in pairs, so don't buy just one. Be sure you have two different sided trunk shocks. They are labeled either L (left) and R (right) or, A (left) and B (right):
![[Linked Image]](https://celicahobby.com/installs/guides/trunk_shocks_lsd_02.jpg)
Just so long as you install them where the letter is right side up and readable, it's hard to screw up.
Information:Whomever was in charge of designing the stock Toyota trunk shocks probably did not take into account that they would one day have to be replaced. The way they are designed they are very difficult to remove. The two bolts at the bottom of the trunk shock are no problem. It's the ballstud-bolt at the top that takes work getting out. The screw is thread-locked in using locktite or some other screw adhesive. This means it is nearly impossible to remove (you will strip the bolt trying) unless you first apply direct heat to the bolt. I will get to that later on. In addition, the ballstud-bolt is made out of a cheap pot-metal that easily bends and strips. This is why I recommend cutting through the ball stud and then using a socket wrench to remove the bolt. You are much less likely to strip the bolt torquing it with a socket wrench from six sides of the bolt rather than only two sides from a hard to reach angle with pliers or a wrench.
First off, gather all of your tools and materials. Be sure you are wearing comfortable clothing without any sharp metal surfaces (metal belt buckles, metal buttons, etc) that may scrape your car. You will be leaning on and against your car for a lot of this.
Oh and don't try and take both trunk shocks off at once. As you will see for yourself the trunk is quite heavy even with just one trunk shock off. Remove and replace the trunk shocks one at a time, otherwise you may end up with a trunk smashed on your head or hands.
Procedure:1. Prop open your trunk using your wooden plank, pole, or friend with arms.
2. Remove the strings to your trunk cover so it rests in the down position. You may choose to remove the trunk cover entirely:
![[Linked Image]](https://celicahobby.com/installs/guides/trunk_shocks_lsd_03.jpg)
3. Tape off the area around the ballstud:
![[Linked Image]](https://celicahobby.com/installs/guides/trunk_shocks_lsd_04.jpg)
It's important to protect the paint and the rubber lining of the trunk in the area you are working. I know it's only the inside of the trunk, but any place you scratch the paint it is prone to rusting, any place you tear the rubber is prone to leaking. You don't want your trunk rusting from the inside out or filling with water or moisture if you can prevent it.
4. Cut through the Ballstud using your hacksaw or dremmel (note, I did not have a picture of cutting the left side ballstud which is why this picture may seem out of place):
![[Linked Image]](https://celicahobby.com/installs/guides/trunk_shocks_lsd_05.jpg)
I used a hacksaw for mine, but a dremmel with a large grinding wheel should work just as easily. With the saw I cut in an upwards motion parallel to the trunk angle to prevent any scratching of the trunk. It's a slow and tedious process and you're cutting from a funny angle without a lot of leverage. Luckily the metal of the ballstud is weak and easy to cut through.
Be prepared for the trunk to drop when you cut through the boltstud. Have the trunk propped up higher than the trunk shocks naturally extend so the trunk does not fall when you cut through the ball stud.
5. Use your heat source on the remaining ballstud. I used a butane lighter for 20-30 seconds from less than half an inch away. Butane lighters are inexpensive and can be purchased from any liquor store for less than $2.00. I recommend the use of a butane lighter instead of a regular lighter because the flame of the butane is directional and can be "focused" directly on the bolt. This is important because the rubber seal of your hatch is an inch away from the bolt and is prone to damage from the heat.
6. Using your 12mm socket wrench, remove the cut ballstud bolt:
![[Linked Image]](https://celicahobby.com/installs/guides/trunk_shocks_lsd_06.jpg)
It should twist right out now. You should see red stuff stuck in the threading on the bolt. This is the loctite that you burnt off with your heat source. When you're putting in the new bolt it will be a little difficult getting it in because there will be remaining locktite still in the threading of the trunk. Try to clear out as much of it as possible with your fingers.
7. Remove the two bolts at the bottom connecting the trunk shock to the base of the trunk and remove the old trunk shock.
8. Using your 12mm socket wrench again, screw in the new ballstud bolt:
![[Linked Image]](https://celicahobby.com/installs/guides/trunk_shocks_lsd_07.jpg)
Be careful not to over torque it when screwing it in. You do want to be able to replace it again in the future assuming you still have the Celica a few years down the road.
9. Attach the new trunk shock to the ball stud.
10. Screw in the bottom two bolts at the base of the trunk shock.
Be sure the shock is orientated the right way. The shock should be towards the rear (trunk) side with the two bolts closer to the front. If you install it the wrong way with the shock further up, it will not lift your hatch fully. It should look like this:
Right Side:
![[Linked Image]](https://celicahobby.com/installs/guides/trunk_shocks_lsd_08.jpg)
Left Side:
![[Linked Image]](https://celicahobby.com/installs/guides/trunk_shocks_lsd_09.jpg)
11. Repeat the process for the opposite side.
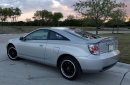
And then you're done:
![[Linked Image]](https://celicahobby.com/installs/guides/trunk_shocks_lsd_10.jpg)
Quick easy and painless. I hope this guide was helpful.