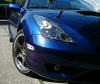
How To Install Headlight InsertsBy Tony @ EverythingCelica.com
![[Linked Image]](https://celicahobby.com/gal3/albums/tony_20040306/100_0019.jpg)
Tater's Headlight Inserts...
https://celicahobby.com/gallery/index.php/category/kit-headlight-insertsTater's Headlight Inserts are relatively easy to install. It took Isaac and I about 5 hours (with a pizza break) to finish it. It involves opening the headlight assembly and replace the stock insert with Tater's.
There are many write-up's already exist on this board (and others) in regards to disassembling the stock headlights. Please keep in mind that this is what we did. It is not the absolute correct way, nor is it the only way. As with any install guide, this is strictly for reference and information only.
eCelica.com, its staff and I are not responsible for any damage/injury to you and/or your vehicle if you chose to use this install guide. Please use common sense. When in doubt, take it to a professional.
Step 1 - removing the headlightRemove the 3 screws securing the headlight. Two of the screws are easy to get to. The third one is covered by the front bumper. You may choose to remove the front bumper. I just had Isaac pulled open the side of the bumper while I removed the screw.
![[Linked Image]](https://celicahobby.com/gal3/albums/tony_20040306/headlight_screws.jpg) Step 2 - prepping the headlight for the oven
Step 2 - prepping the headlight for the ovenOnce the headlight is removed, take out all of the light bulbs and rubber shields. Don't forget to remove the rubber shield from the DRL/high beam. Unlike the low beam, you don't need to remove the shield before removing the bulb. I almost left it on, which would not be good when the headlight is in the oven. Also, wipe-off any excess dirts. Then, remove the 3 screws from the headlight.
![[Linked Image]](https://celicahobby.com/gal3/albums/tony_20040306/backside.jpg) Step 3 - put the headlight in the oven
Step 3 - put the headlight in the ovenThe headlight is not only held together by the 3 screws, but also by tons of heavy duty glue/epoxy. In order to open it up, the glue must be heated. We used a large cooking pan and lined it with a towel. Preheat the oven at 300 degree for 10-15 minutes, then turn it off. Put the headlight in and heat it for about 10 minutes.
![[Linked Image]](https://celicahobby.com/gal3/albums/tony_20040306/000_0152.jpg) Step 4 - opening the headlight
Step 4 - opening the headlightTake the headlight out of the oven and slightly bend the small taps along the side of the headlight. Don't use too much force. They should be soft enough to be bent.
![[Linked Image]](https://celicahobby.com/gal3/albums/tony_20040306/backside2.jpg)
Once the taps are bent, start pryine the headlights apart with a butter knife or similar tool. Work from one end to the other. This is the most difficult part. But, you will get there. Put the headlight back into the oven if the glue starts to cool and harden. Repeat this step as many times as necessary. I had to do it at least 4 times. Again, don't rush! Once you have a large enough opening, then just pull it open with both hands.
![[Linked Image]](https://celicahobby.com/gal3/albums/tony_20040306/DCP_0057.jpg)
Finally, it is opened!! Once it is opened, clean up the excess glue before they get hardened on the clear lens cover.
![[Linked Image]](https://celicahobby.com/gal3/albums/tony_20040306/DCP_0060.jpg) Step 5 - replacing the inserts
Step 5 - replacing the insertsThere are 2 small screws holding the stock insert in. Remove them and pop the insert right out.
![[Linked Image]](https://celicahobby.com/gal3/albums/tony_20040306/insert_screws.jpg)
Put the new insert in and secure it with the same little screws.
Step 6 - Trim the turn signal reflectorThe stock turn signal reflector must be trimmed in order for the new insert to fit. Remove the small screw holding the reflector. (pics courtesy of Tater)
![[Linked Image]](https://celicahobby.com/gal3/albums/tony_20040306/reflector2.jpg)
Mark the area to be cut and trim it with a Dremel or similar cutting tool.
![[Linked Image]](https://celicahobby.com/gal3/albums/tony_20040306/reflectors.jpg)
Reinstall the trimmed reflector.
Step 7 - putting the pieces back togetherWe are almost done! For a better seal, Tater suggested using hot glue around the edges. Hot glue gun and glue sticks can be purchased from any craft/hobby store for less then $10. Isaac and I skipped this because there were plenty of glue on the headlight already. Plus, I wanted to use silicon instead.
To reassemble the headlight, align the two pieces and press firmly. By this time, the glue should be cooled and hardened. Put the headlight back in the oven to heat up the glue again. Repeat this until the headlight is closed completely. Then, bend the tabs back. Apply an even amount of silicon on seam of the headlight. One is done!!
![[Linked Image]](https://celicahobby.com/gal3/albums/tony_20040306/000_0161.jpg) Step 8 - reinstalling the headlight
Step 8 - reinstalling the headlightThe last step is pretty self-explanatory. Reinstall the light bulbs and rubber shields. Put the headlight back on the car, and secure it with the 3 screws. Repeat steps 1-8 for the other side.
Test it. It works!!
![[Linked Image]](https://celicahobby.com/gal3/albums/tony_20040306/DCP_0064.jpg)
More pics can be found here:
Tater's Headlight Inserts
installed...
https://celicahobby.com/forums/ubbt...-Installed-lots-of-pics-56K-warning.htmlTater's Headlight Inserts
additional photos...
https://celicahobby.com/gallery/index.php/category/tony-20040306I hope you have enjoyed this install guide and have found it to be useful. Thanks to Tater for a beautiful, high quality product. If you chose to purchase one, please contact Tater. The current price is $275 plus shipping. Sam and I both paid $80 for paint.


![[Linked Image]](https://celicahobby.com/forums/attach/1869928836-Evan2.jpg)
![[Linked Image]](https://celicahobby.com/photos/download/94816-2/HeadlightTonysig.jpg)


![[Linked Image]](https://celicahobby.com/ubbthreads/attach/profile/2042-6.jpg)

![[Linked Image]](https://celicahobby.com/forums/attach/1869906780-UfCeli.jpg)


![[Linked Image]](https://celicahobby.com/sig/id242u.jpg)
