|
|
Joined: May 2002
Posts: 5,979 Likes: 9
ECelica Admin 2001 Toyota Celica GT
|
|
ECelica Admin
2001 Toyota Celica GT
Joined: May 2002
Posts: 5,979 Likes: 9 |
![[Linked Image]](https://celicahobby.com/tech/bulbs/bulb-h7.jpg) Headlights, Low Beams - H7 HALOGEN 55watt How-To replace the Headlights (Low Beams)from page 210 of the owners manual:1) Remove the clips from your engine plastics. Use a Phillips-head screwdriver to push down on the circle in the center of the plastic clips, this will unlock them. Then use a flat-head screwdriver (or your finger nail) to pop out the clip. To reinstall the clips, push the peg back up and insert the clip, then push the peg down. It makes sense when you try it, or just look in the owners manual. 2) Remove the engine plastics - in doing so, also remove the windshield-washer hose from the notch on the cover. 3) Unplug the headlight electric connector (if the connector is tight, wiggle it). 4) Remove the rubber cover. 5) Release the bulb retaining spring and remove the bulb along with the socket. Pay careful attention to how the retaining spring works. The driver's side should be easiest to perform. The passenger side may take much longer - In comparison, I find that the passenger side can be difficult to re-clip. ![[Linked Image]](https://celicahobby.com/photos/download/116924-1/20070712_20-28-13.jpg) ![[Linked Image]](https://celicahobby.com/photos/download/116922-1/20070712_19-28-36.jpg) 6) Install new bulb into the socket and return the bulb retaining spring to its original position. (to install a bulb, align the tabs of the bulb with the cutout of the mounting hole) 7) Install the rubber cover with the "TOP" mark upward. Insert the electrical connector. (make sure the rubber cover fits snugly on the connector and the headlight body. Aiming is not necessary after replacing the bulb. When you believe aiming adjustment is necessary, contact your Toyota dealer8) The last step is to reinstall the engine plastics (always notch the windshield washer hose before fastening it when installing the engine plastics. This prevents washer hose damage)
|
|
1 member likes this:
CAPTAINSOLO |
|
|
|
|
Joined: Feb 2004
Posts: 1
New Member 2000 Toyota Celica GT
|
|
New Member
2000 Toyota Celica GT
Joined: Feb 2004
Posts: 1 |
How do you release the bulb retaining spring. I tried pulling and it wouldn't let up so I didn't want to force it because I might break it. What the motion to remove the clip? Please help!
|
|
|
|
|
Joined: May 2002
Posts: 5,979 Likes: 9
ECelica Admin 2001 Toyota Celica GT
|
|
ECelica Admin
2001 Toyota Celica GT
Joined: May 2002
Posts: 5,979 Likes: 9 |
push IN and then UP (or DOWN if working on the opposite side)
its clipped in - just like the clip on the back of a badge
![[Linked Image]](https://celicahobby.com/sig/id242u.jpg) It's not just your imagination... Your day really does go by twice as fast while on EverythingCelica.com
|
|
|
|
|
Joined: Dec 2004
Posts: 3
New Member 2000 Toyota Celica
|
|
New Member
2000 Toyota Celica
Joined: Dec 2004
Posts: 3 |
The right (passenger side) retaining spring is a pain to put back on. I spent only seconds to lock the left (driver's side) retaining spring, but I spent 1/2 an hour trying to get the right retaining spring back in place. Any tips? Should I just remove the whole headlamp assembly?
|
|
|
|
|
Joined: May 2002
Posts: 5,979 Likes: 9
ECelica Admin 2001 Toyota Celica GT
|
|
ECelica Admin
2001 Toyota Celica GT
Joined: May 2002
Posts: 5,979 Likes: 9 |
CorvetteObsessed, I absolutely agree!
To make things a bit easier, have a friend shine a flashlight through the outside of the assembly - if you look down through the top of the headlamp enclosure, you can view everything a bit more clearly and this install will be a bit less frustrating.
|
|
|
|
|
Joined: Aug 2003
Posts: 1
New Member
|
|
New Member
Joined: Aug 2003
Posts: 1 |
I've replaced my bulbs but the left side doesn't look right when it's on at night.
You mention
"(to install a bulb, align the tabs of the bulb with the cutout of the mounting hole)"
I didn't see how the tabs and the 'mounting hole' match up...will the light fit in even if they're not matched up?
the whole experience didn't go very well...I have seen a newer vehicle with a headlight bulb that was more difficult to replace.
Thanks,
ReTRD
|
|
|
|
|
Joined: Feb 2005
Posts: 30
Member 2001 Toyota Celica
|
|
Member
2001 Toyota Celica
Joined: Feb 2005
Posts: 30 |
Anyone else use the Nokya bulbs?? I just installed them and their fitment is terrible. The factory bulbs used 2 tabs as the Nokya only uses one, there is way too much play for the bulbs to move around. I 'd return them but I've got one original burned out and the local Nazis have ticketed me twice so far for it being out.
Anyone else have a similar problem with these bulbs and had any problems with them flopping around or have a solution to getting them to fit better? Or know of a better bulb with better fitment?
|
|
|
|
|
Joined: May 2002
Posts: 5,979 Likes: 9
ECelica Admin 2001 Toyota Celica GT
|
|
ECelica Admin
2001 Toyota Celica GT
Joined: May 2002
Posts: 5,979 Likes: 9 |
X_Factor, turn the bulb right-side-up and you will not have that problem. you may be trying to install the light bulb upside-down. Or your problem could simply be that you have not yet moved the black plastic H7 Bulb Adapter from your old bulb to the new one. The plastic bulb adapter just unplugs from the old bulb. See #6 in this image ![[Linked Image]](https://celicahobby.com/tech/bulbs/headlight.jpg)
|
|
|
|
|
Joined: Nov 2014
Posts: 1
New Member
|
|
New Member
Joined: Nov 2014
Posts: 1 |
I just finished replacing the passenger side low beam. Even with the helpful images, it took me an hour. Here's what I've learned. Before installing the new bulb, practice hooking the wire clip in the slot first. This is a hard enough task without the new bulb being in the way. 1. Disconnect the power steering fluid reservoir, using a flat-head to disengage the retaining clip from the outside of the housing. I gained half an inch of precious work-space from doing so. 2. Wedge your head between the hood and the hood support rod, resting your left ear just above the shock/spring housing. With a flashlight, you can barely see the slot groove with your left eye. 3. Grab the end of the spring clip with your right thumb, squeezing it towards the engine first, then towards the front bumper, then finally towards the ground. Although it feels nothing like it, it looks as if your trying to grope your girlfriend's left breast from above her left shoulder, while standing in front of her. Like with the girlfriend, it doesn't take a lot of force if it's done right. Repeat it a couple of times to get a good feel. [img] http://imgur.com/pkXcqvp[/img] 4. Try doing the same with the new bulb in.
|
|
|
|
|
Joined: May 2002
Posts: 806 Likes: 15
CelicaSpecialist 2008 Scion tC
|
|
CelicaSpecialist
2008 Scion tC
Joined: May 2002
Posts: 806 Likes: 15 |
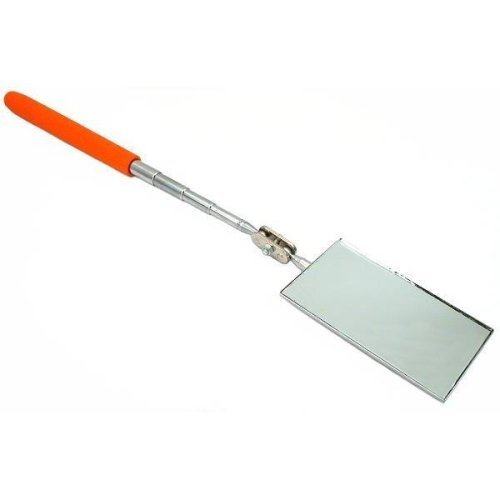
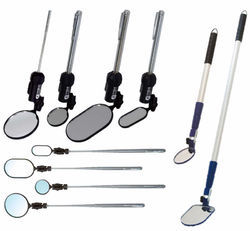
An item that may come in handy and can be found for about $5 (or less) in the tool section of your local Home Depot or Sears parts center is a "Mechanic's Mirror" or otherwise named, "Inspection Mirror"
They are very useful to slide in to a tight spot, to get a better view of the backside of different components.
EDIT: A common Men's "Wallet Mirror" or Woman's "Make-up/Compact Mirror" could also work.
 Mechanic's Mirror Mechanic's Mirror
 Inspection Mirror Inspection Mirror
|
|
|
|
|
Joined: Dec 2017
Posts: 243 Likes: 30
Member
|
|
Member
Joined: Dec 2017
Posts: 243 Likes: 30 |
H7 LED bulbs are much brighter than Halogen. LEDs with fans in the back is the brightest., but the size and shape of LED bulbs with the fan wont fit properly into the Celica's socket.
Bought a pair of Hikari for $35, allegedly produce 8000 Lumen white light each about 20x brighter than OEM stock. I can line up the tab on the base of the bulb into the slot on the socket and insert it all the way in. The LED elements would be in the exact position as the Halogen filament and the lens would focus the beam. But the black connector adapter cannot be used with the LED's fan in the back. So the clip spring cannot hold the LED bulb in tightly.
With the clip spring loose, the weight of the fan drag the back of the bulb down, moving the LED element away from the optimum focus point, LED beams are therefore odd shaped, not a flat beam that sine a swath of road in front of the car.
I had to use foam to shim the bulb in place, but the foam does not press the bulb's base tight against the socket so the beam is not focused. I will fashon a ring of rubber bands around the base of the bulb to help the clip spring hold it in tight.
The head lights work OK now, but not a solid swath of light in front of the car. So I am still trying to improve it. Strange thing I put in LEDs in antoher Celica and it worked perfectly. I dont remember exactly how I did it, and I am afraid to take it out as it may not work again.
LEDs are worth it if they focus the beam properly. Will advise progress.
Thanks for sharing the pics of the socket. Really helps.
Last edited by CAPTAINSOLO; Sep 15, 2020 9:14pm.
|
|
|
- Part Reviews
- OEM Parts Catalog
- Body Kits, Ground Effects
- Hoods, Hood Scoops
- Spoilers, Wings, Splitters
- Side Mirrors
- Head/Tail Lights & Bulbs
- Interior Appearance
- Interior Performance
- Engine Dress-up Kits
- Exhaust Systems
- Engine Performance
- Bars, Braces, Coilovers
- Shocks, Springs
- Wheels, Tires, Brakes
- Audio, Video, Security
|
|
|
|